Tuesday, May 21, 2013
Dress Rehearsal
First, a few other things I did to the cabinet...
Time to give it a test run. I wanted to give the cabinet a try but did not want to commit to a long test or one with expensive meats. My wife found some cheap steak in the freezer and I figured it was worth a try. I do not know if cheap steak is smoke-able or not but it will be my test.
Here is everything ready to go. I placed the steak on an old toaster oven tray so that it would not stick to the rack and would be easier to remove when done. I also have a pan of water to keep everything humid and a pan of chips, some soaked in water.


After a bit over 2 hours I noticed the smoke had quit coming out of the back of the cabinet. I discovered that all of the chips had burned out and, as I started to add more, I decided to check on the steak. I cut into it and it looked done so I decided to shut everything down.


I can not say that the steak absorbed a lot of smoke. It did taste somewhat smokey but not much. As I said before, I was not sure how it would turn out. That aside, I call the test a success. Everything worked as desired and now I am planning my next smoke on some chicken.
- Caulked all inside corners with silicon aquarium sealant (it is safe to use in the smoker)
- Attached thin weather strip around the doors to prevent smoke/heat loss
- Drilled a tiny hole in the top of the cabinet so that a thermometer could be dropped in
Time to give it a test run. I wanted to give the cabinet a try but did not want to commit to a long test or one with expensive meats. My wife found some cheap steak in the freezer and I figured it was worth a try. I do not know if cheap steak is smoke-able or not but it will be my test.
Here is everything ready to go. I placed the steak on an old toaster oven tray so that it would not stick to the rack and would be easier to remove when done. I also have a pan of water to keep everything humid and a pan of chips, some soaked in water.


After a bit over 2 hours I noticed the smoke had quit coming out of the back of the cabinet. I discovered that all of the chips had burned out and, as I started to add more, I decided to check on the steak. I cut into it and it looked done so I decided to shut everything down.


I can not say that the steak absorbed a lot of smoke. It did taste somewhat smokey but not much. As I said before, I was not sure how it would turn out. That aside, I call the test a success. Everything worked as desired and now I am planning my next smoke on some chicken.
A Decorative Element
I wanted to give my smoker a little pizzaz so I decided to name it and put that name on the front door. I decided to call it "Smokin' Hot" and googled the internet searching for images with similar words. I found this photo of a sign.

I printed it out, full page.

And then cut the letters out.

I then found a roll of roof flashing and cut a piece of that to work with.

I took each letter, placed it on the flashing, and marked the outside of it with a marker.


Then I cut out the letters.


With the door removed from the cabinet, and laying on the work bench, I played around a little bit until I found a layout I liked.

Using a propane torch I proceeded to burn the wood around the letters.

And doing so, I messed up. I wanted to burn on the wood not covered by the metal letters but made a mistake of keeping the flame on top of the letters for too long. This caused the wood under the letters, although not exposed to the flame directly, to still heat up and burn.

As you can see in the above image the 'H' is way to dark. :/ I was not happy about this outcome and it bugged me for several days. Through a suggestion my dad made I realized I could just sand the entire area and try again. I sanded just enough so that some of the burns remained - enough so that I could properly relocate the letters - and tried again. This time I made quicker sweeping motions with the flame and didn't pause it over any one area. Here are the results from that effort.


I was much happier with these results.
Vents
I added a couple of vents to the back of the cabinet - one at the top and one at the bottom. I also needed to be able to control the size of the opening. Here is what I came up with...
I drilled two large holes.

Then I took some of my scrap wood and made these half-moon shapes.

Scrounged up a couple of bolts and drilled some holes.

And drilled some more holes.

And then put it together.


I tightened the nuts just enough to make it somewhat difficult to turn the cover. Now I can control the amount of smoke in the smoker.
Friday, May 17, 2013
Time To Get Wired
Time to get the electrical stuff figured out and done. I removed the remaining electrical components from the original hotplate bases and fumbled through getting them installed in a plastic project box from Radio Shack.


It took a little effort to get them removed from the original bases.

With a little thinking I was able to figure out what needed to be cut and trimmed on these controls. After that I took some measurements and drilled some holes.


Not too bad. I had to go back later and move some of the screws as I found that when the knobs were installed the screw heads got in the way preventing the knob from sliding on all the way. This frustrated me a little but was easily resolved.
Time to run the wires from the controls to the heating elements. 2 burners, 4 wires, each about 4' in length. Good, now time to find high temperature wire. My original plan was to run these wires inside the cabinet and have them enter the control box from the bottom. Because of this I needed about 20' of wire. I found a source on eBay and ordered what I needed. This stuff is kinda expensive which bothered me later when I changed my plan and had the wires run up the outside back of the cabinet - meaning that I could use regular wire for that since they would not be in the heated area on the inside. I decided to go ahead and run the high temperature wire on the outside because, otherwise, I would have had to come up with some type of junction box at the bottom where the high temperatures wires would connect to the regular wires. I opted not to do this and just use what I had. I dug through my strap pile and found some PVC pipe to use as conduit. First drill a hole in the back bottom for the pass through.


Here is the wire.

Here is the wire cut to somewhat equal lengths.

I 'tagged' two of the wires on both ends with a black Sharpie marker so that later I would know which two at the bottom, connected to one of the elements, corresponded to its controller at the top. After marking I ran them through the pipe.

And then put the pipe in place.

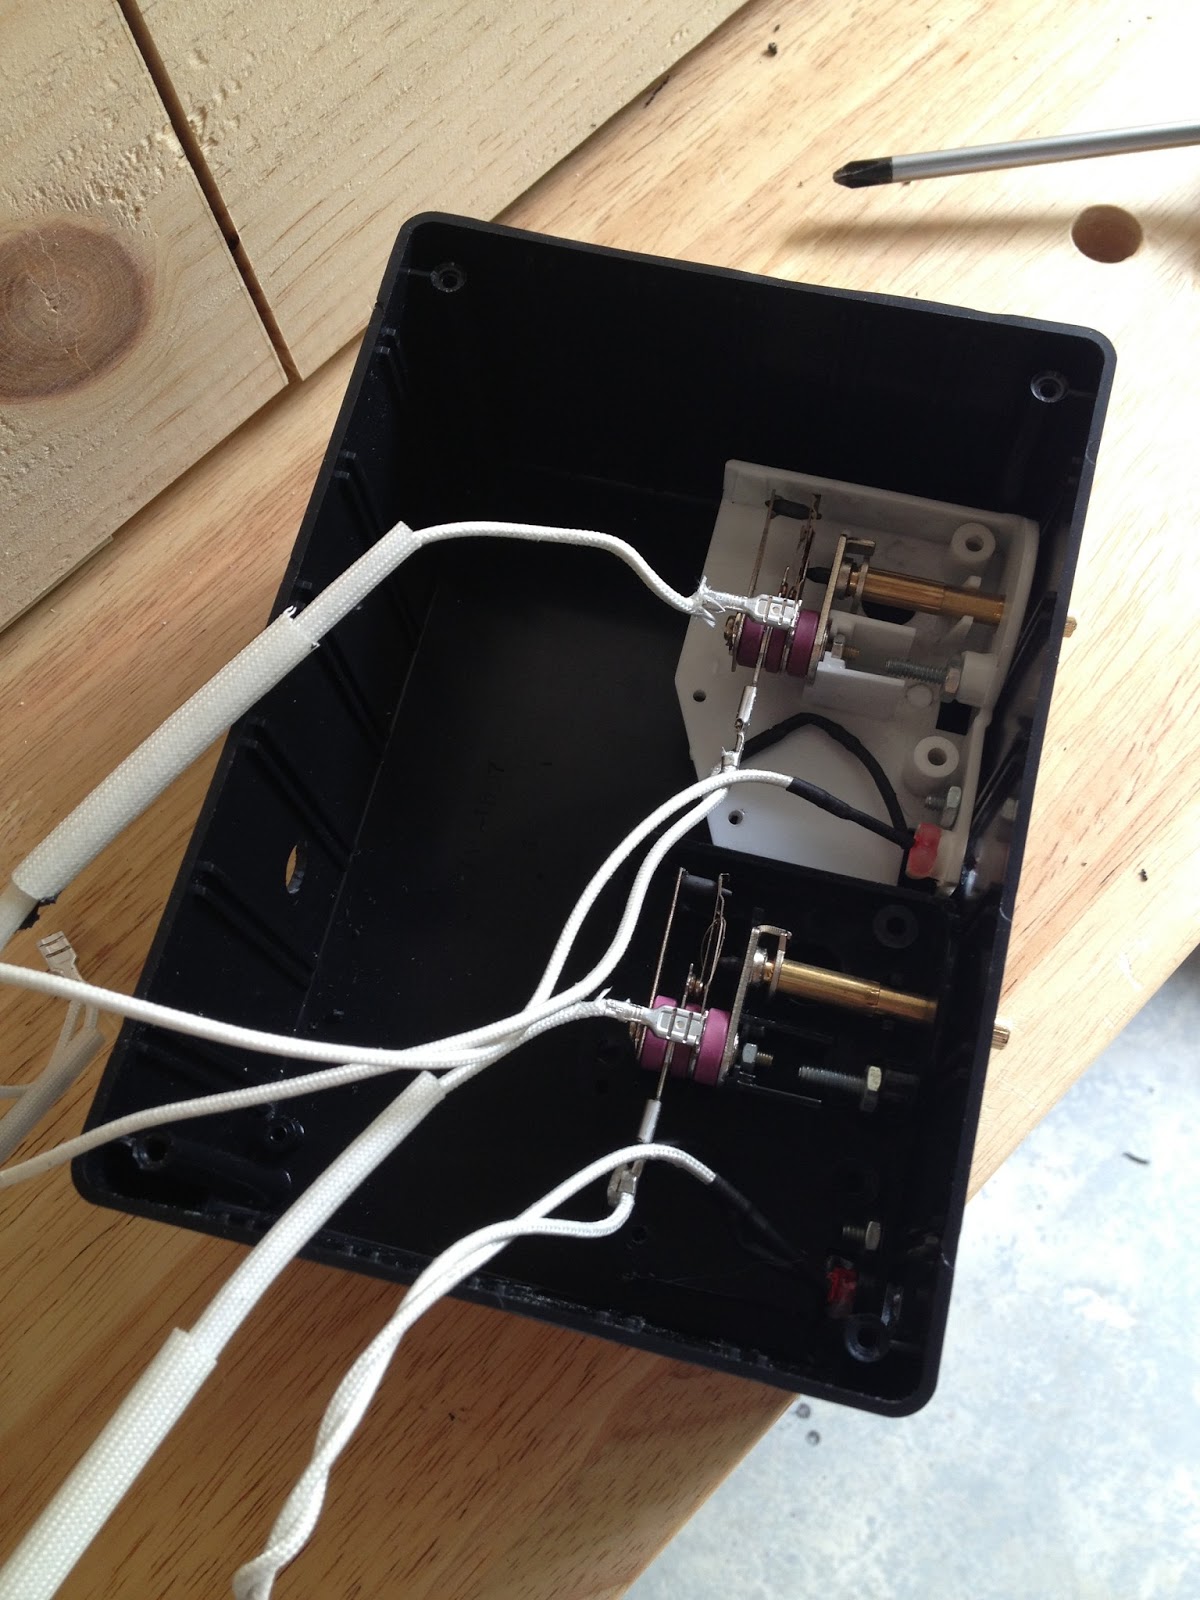
Here the wires enter the control box.

I secured the pipe to the back of the cabinet.

I crimped on some high temperature connectors and joined the wires to the heating elements.


With a little fussing I was able to get the control box wired but not without some damage. Somehow I managed to break a lead off of one of the 'power on' indicator LEDs. A trip back to Radio Shack gave me some bulbs. I replaced the LEDs with the new bulbs.

I screwed the cover in place and called it done.


With a little thinking I was able to figure out what needed to be cut and trimmed on these controls. After that I took some measurements and drilled some holes.
Not too bad. I had to go back later and move some of the screws as I found that when the knobs were installed the screw heads got in the way preventing the knob from sliding on all the way. This frustrated me a little but was easily resolved.
Time to run the wires from the controls to the heating elements. 2 burners, 4 wires, each about 4' in length. Good, now time to find high temperature wire. My original plan was to run these wires inside the cabinet and have them enter the control box from the bottom. Because of this I needed about 20' of wire. I found a source on eBay and ordered what I needed. This stuff is kinda expensive which bothered me later when I changed my plan and had the wires run up the outside back of the cabinet - meaning that I could use regular wire for that since they would not be in the heated area on the inside. I decided to go ahead and run the high temperature wire on the outside because, otherwise, I would have had to come up with some type of junction box at the bottom where the high temperatures wires would connect to the regular wires. I opted not to do this and just use what I had. I dug through my strap pile and found some PVC pipe to use as conduit. First drill a hole in the back bottom for the pass through.
Here is the wire.
Here is the wire cut to somewhat equal lengths.
I 'tagged' two of the wires on both ends with a black Sharpie marker so that later I would know which two at the bottom, connected to one of the elements, corresponded to its controller at the top. After marking I ran them through the pipe.
And then put the pipe in place.
Here the wires enter the control box.
I secured the pipe to the back of the cabinet.
I crimped on some high temperature connectors and joined the wires to the heating elements.
With a little fussing I was able to get the control box wired but not without some damage. Somehow I managed to break a lead off of one of the 'power on' indicator LEDs. A trip back to Radio Shack gave me some bulbs. I replaced the LEDs with the new bulbs.
I screwed the cover in place and called it done.
Subscribe to:
Posts (Atom)